How to complete my timesheet
This help page only concerns you if you use the timesheet.
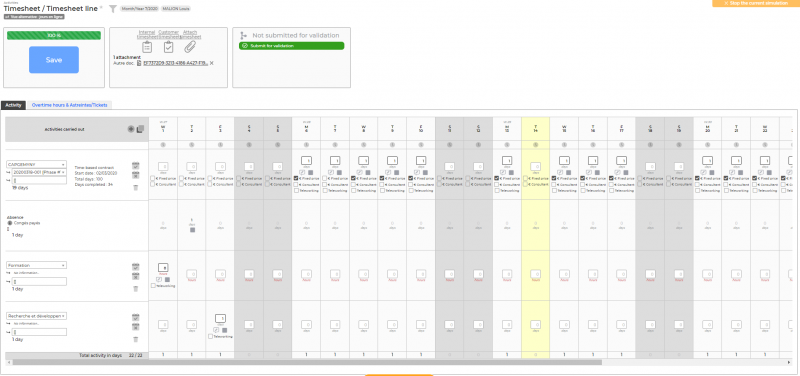
The timesheet offers days in columns.
If you only see days in lines, it's that you use the Timesheet line menu.
You can enter your activity in the Activities > Timesheet/Timesheet line menu.
This screen allows you to declare your activity over a whole month.
At the top of the screen, you will find the validation status of your timesheet. You will also find functions for editing the timesheet in order to have them signed by your customers and a button to load the signed and scanned file for example.
Then, you find a table wich represents the days in columns and a row by activity carried out in the month.
Screen actions
Global actions
For a month that has never been opened or saved, a line is present with 0 days or hours indicating that no activity is entered (the name of the item can be configured).
To add a first activity line, all you have to do is to click on the Add an activity line button. You can then indicate the load, in days or hours, for each day of the month.
 Replicate the items from the previous month
To have access to this functionality, you must have the active right 'Administration > Security Groups > Activities > Be able to replicate the sections declared for the previous month in the current month.
This function allows you to duplicate the activities of the previous month. Only the titles of internal sections and / or unfinished business are duplicated. The timesheet will not be completed (this action will remain the responsibility of the employee).
Actions for updates lines
Actions on each row
 Delete row
Allows you to delete a line and therefore the activity that is concerned.
 Clear the time spent on this activity
Allows to empty the entire activity line.
 Complete the month with this activity
Allows employees to enter their activity all at once for a business that lasts at least one month. So you cannot use this action when you have different activities during the same month.
Actions on each time entry cell
In a cell, several actions are possible.

A comment can be indicated on each cell. Click on the button circled in pink in the screenshot above and enter your comment in the input box. Click outside this area to exit. The box where the comment has been filled in is colored in orange.
If several comments are associated with a row, you can find the overall summary in the column “Activities carried out”.
 \\For each cell, you can indicate whether it is an activity practiced all day, in the morning or after midday. Click the circled button in the screenshot above and choose the time from the drop-down list.

For each cell, depending on your rights, you will be able to consult / modify your work schedules and your lunch break.
Overtime hours, on-call duties
 Declare on-call duties/tickets Allows you to declare on-call duties and tickets that can be associated or not to a client and a mission and thus be rebillable.
 Remove all declared units of work Allows you to delete, in one action, all units of work that have been declared.
 Declare extra hours Allows you to declare overtime that may or may not be associated to a client and a mission and thus be rebillable.
A window opens and offers a form :
- To add an entry line, click on Add an element
- A line is used to declare an overtime duration which started at a date and time that must be specified.
- Each declared time range expects a comment and can be attached to a client and a mission.
- To save the overtime hours declared on the current month, click on the Save button.
When additional hours have been added, they also appear at the level of the day concerned.
 Delete overtime hours Allows you to delete, in one action, all overtime hours that habe been declared.
Your daily use
Selection of the month to be entered
By default the screen opens on the current month or the last month can be viewed if you have already used the timesheet.
You can read the month displayed above the timesheet.
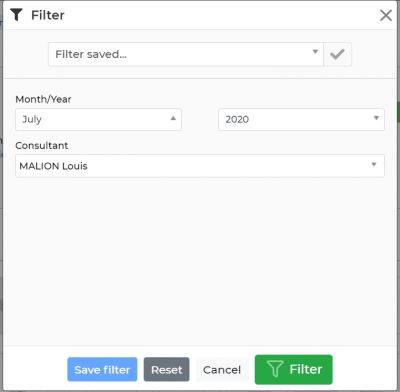
If the month is not the one you want, you can change it using the filter.
If the filter is not open, unfold it by clicking on the funnel.
Then select the desired month and year, then click on Apply filter.
Time allocation for each activity
For a line of activity, it's necessary to enter the time spent on each day.
Several input options are possible depending on the rights assigned to you :
- Fill in an internal activity
- Fill in an internal project
- Enter an absence (reminder: you can also make your absence requests from the Human ressources screen : Human resources > My absence requests)
- Fill in a client (mission carried out on which you have been assigned)
If you choose absence, you must select the type of absence.
If you choose a client, you must select the mission.
Important : Pay attention to the business section on which you enter your time because several lines may be displayed.
Wrong entry = possible billing errors.
The entry unit is indicated below each box to be filled in, it can be days or hours. Decimals are allowed to indicate fractions of days or hours.
Don't forget to save
Any changes are not saved until you click the Save button.
As soon as a modification has been made, the Save button turns orange and if you try to exit the screen, you are warned by a dialog box that unsaved modifications have been made. The modified cells also take an orange color background.
Editing and printing of documents
The application offers you several PDF documents intended to be printed and possibly signed by your customers..
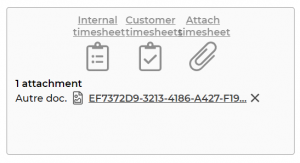
Everything happens in the Actions & Attachments box.
You can :
 Internal timesheet
Get your internal activity report in PDF format
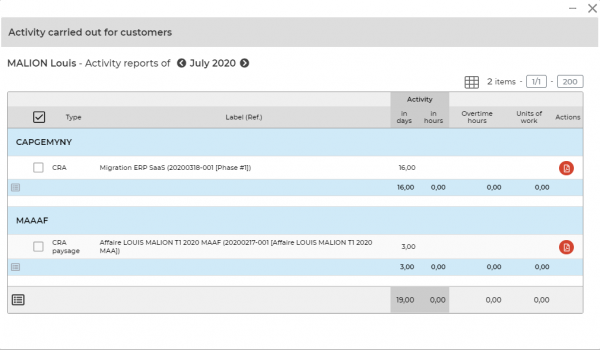
 Customer timesheet
Retrieve your documents client by client. The format and language of the document depends on what was selected for the mission in the business section.
In the Actions column, you can :
 : Download the PDF of the Customer timesheet concerned
If you have worked for the same client on 2 different contracts, you will have 2 PDF customer timesheets available, one per contract. You can decide to group everything in a single document by checking the boxes of the desired timesheets and clicking on Grouped Timesheets.
 : Send the document to the customer for electronic signature.
If your company has this system in place, you will be able to send your timesheets to your customers for signature. This makes it possible to no longer download the PDF, to send it to your customer and to upload it in VSA.
Validation of your timesheet
Once your activity is recorded on your timesheet, you can submit it for validation.
- A window opens with a form :
- Choose the responsible person(s) to whom to submit your timesheet, put a comment with any particular information to be aware of in order to validate your timesheet.
- Click on the Submit button.
- The selected manager(s) will receive an e-mail notifying them of your request and will be invited to validate your timesheet. In case of acceptance or refusal, you will be also notified by e-mail.
- The status of your timesheet will always be visible.


